Travel Log
***All Graphic can be found on the shared drive. Create a folder in your document called “My Travel Log”. Copy all the files from the shared Drive into that folder.
Dreamweaver lets you choose how it references images: with document-relative or site-root-relative references. Until you save your file, Dreamweaver has no way to create the reference. You should always save your document before you insert graphics. If you don’t, Dreamweaver displays an alert box and then fixes the file name path when you do save the Dreamweaver file.
- Define a new site and name it My Travel Log.
- Create a new file and save it as travel_log.htm
- In the Page Properties dialog
box, change the background color to #006699 and the default font color
to #FFFFFF. - Type in the text shown in the graphic below. Don't worry about the graphics now, but you can download the zip file to the same folder and you will put them into the document later.
- Position the insertion point on the first line of the document.
- Click Image
 on
the Common Objects panel or choose Insert > Image to insert a graphic
on the page. The Select Image Source dialog box opens.
on
the Common Objects panel or choose Insert > Image to insert a graphic
on the page. The Select Image Source dialog box opens. - Select Banner_head.gif, then click OK to insert the image in the document.
- Type banner graphic in the Alt text box.
- In the Property inspector,
click
 .
If you don’t see the
.
If you don’t see the - Select the text My Diving Travel Log. Make this text an italic heading 2, using the Verdana font, and left-align it.
- Place your cursor in front of the text "We returned August 12th from our Compass diving trip. " Insert the diver photo.
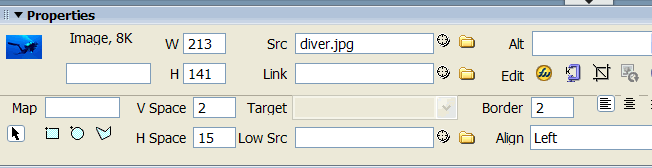
- Select the diver graphic. In the Property inspector, choose Left from the Align pop-up menu. The text wraps around the diver graphic.
When you use an Align option to wrap text around graphics, you will probably want to adjust the space around the image as well. You can do this in the Property inspector.
- In the Property inspector, type 15 in the H Space text box. This creates 15 pixels of space on both the left and right sides of the image. You cannot add space on only one side.
- Type 2 in the V Space text box. This creates 2 pixels of space at both the top and bottom of the image.
- In the Border text box of the Property inspector, type 2. A 2-pixel border is added to the diver image. The border color is always the same as the default text color specified in the Page Properties dialog box.
Often you will want to control the placement of a graphic on the page in relation to a single line of text that appears near it. You can change the relative location of the graphic to the text by using options in the Property inspector.
- Place your cursor in front of the text "Check out some of the fish we saw." Insert the fish gif. Give it an alt name.
- Click on the fish graphic to select it.
- In the Property inspector, choose Absolute Middle from the Align pop-up menu. The text appears centered on the fish graphic.
- Select the fish graphic and add a 2-pixel border to it.
- In the Property inspector, type 15 in the H Space text box. The graphic and text move apart.
- Save the file and preview it in the browser.
You can easily achieve special effects by using Flash buttons and animations. Because Flash graphics are vector based, they have very small file sizes. This helps them load quickly in the user’s browser.
- In the travel_log.htm file you’ve being using, position the insertion point below the fish graphic in the center of the Document window.
- On the Common Objects panel, click Flash Button.
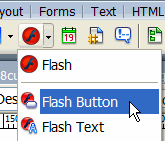
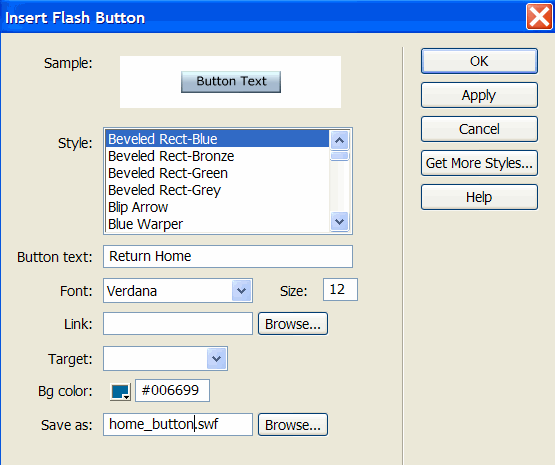
- The Insert Flash Button dialog box opens.
- From the Style pop-up menu, choose Beveled Rect-Blue.
- In the Button Text text box, type Return Home.
- From the Font pop-up menu, choose Verdana (or your font choice if Verdana is not available).
- In the Size text box, type 12.
- For Bg Color, click the color chip. Then, using the eyedropper, click anywhere on the background in the Document window. The background color code #006699 appears in the Bg Color box.
- In the Save As text box, type home_button.swf and then click OK. The Insert Flash Button dialog box closes.
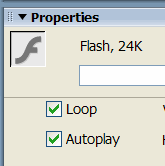
- In the Property inspector, click Play. The button is in its original state.
- In the Document window, move the pointer over the Return Home button. The button changes to its rollover state.
- Click the button. It changes to its clicked state.
- Save the file and preview it in the browser. The button changes states just as it did in Dreamweaver, depending on the pointer position and mouse click.
To modify a Flash button:
- In the Document window, double-click the Flash button. The Insert Flash Button dialog box opens.
- If the dialog box does not open, click Stop in the Property inspector and then double-click the Flash button again.
- Make changes to the options. For example, change the font to Arial.
- Click Apply to see the changes.
- Click OK when you finish.
You can add Flash animations to your document as easily as adding an image, provided the animation has already been created. You can resize the animations to your specification by dragging the handles. Unlike Flash buttons, you cannot create these animations directly within Dreamweaver.
- Position the insertion point below the Flash button. If your insertion point is not centered, click Center in the Property inspector. The insertion point is now centered on the page. The next object you add to the page will be centered.
- On the Common Objects panel,
click Flash
 .
.
- Select surfAd and click Insert. The Flash animation is placed on the page.
- In the Property inspector,
choose
- Click Play to view the animation in Dreamweaver.
- Save the file and preview it in the browser.