Compass Adventure Tours
***All Graphics can be found on the shared drive. Create a folder in your documents called
“Compass Adventure Tours
Hypertext links can “jump” the user to another document within the current Web site or to a page at another Web site. The following exercise shows techniques for linking to a document within the site or for creating an external link.
- First you will need to define a new site name Compass Adventure Tours.
- Type the text shown in the graphic below. Name it welcome.html. Assign the page a title "Welcome."
- You will insert the images and links later in this exercise.
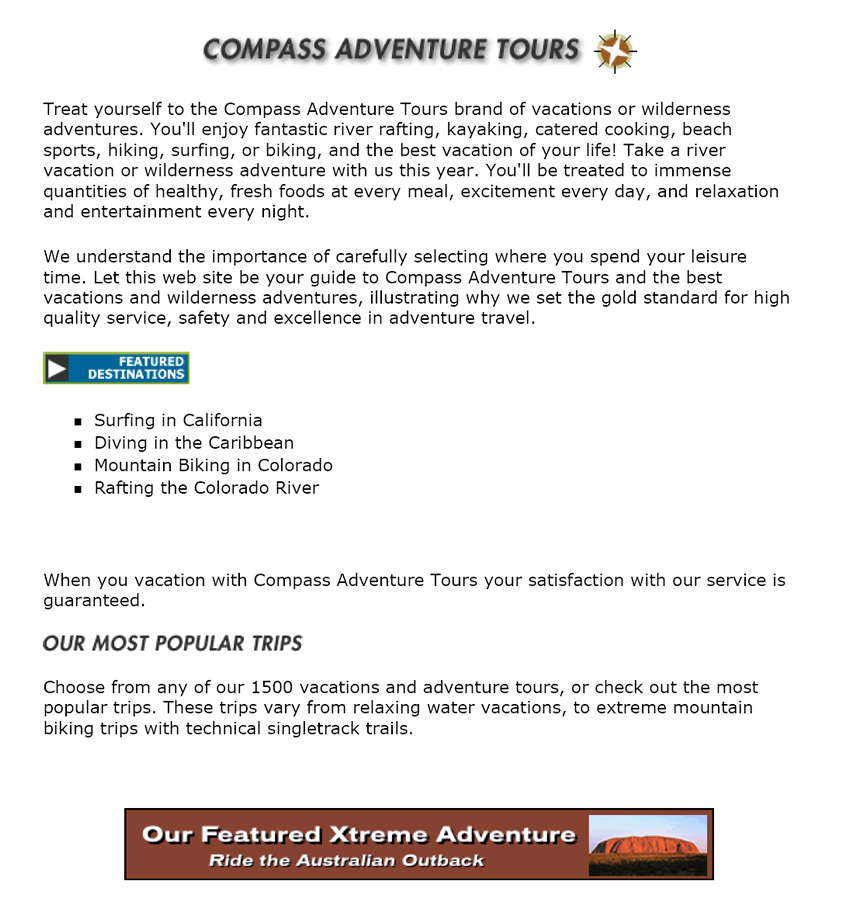
Click on the links below to open the additional html pages you will need to complete. Save each file with the given name and make sure you insert the correct graphics file on each page that you should have already downloaded from the zip file at the top of the page.. These html pages will be used in this links activity. Format the text and use the correct text wrapping option to make sure the photo looks like it does on the displayed page.
Open the page below. Save it as surfing.html. Include the page title "Surfing." Graphic used on this page is boy_surfer.jpg.
Open the page below. Save it as diving.html. Include the page title "Diving." Graphic used on this page is diver.jpg.
Open the page below. Save it as biking.html. Include the page title "Biking." Graphic used on this page is downhill.jpg.
Open the page below. Save it as biking.html. Include the page title "Raftinging." Graphic used on this page is rafting.jpg.
Once you have saved all the pages above, return to the welcome page.
- In the Document window, select the word “Surfing.”
- In the Property inspector, click the folder icon to the right of the Link text box.
![]()
- The Select File dialog box opens. Locate the surfing.html document and click Select. The file name surfing.html appears in the Link text box.
![]()
- Save the file and preview it in the browser.
- Repeat the steps above to link the word “Diving” to diving.html, the words “Mountain Biking” to biking.html, and the word “Rafting” to rafting.html.
- Save the file and preview it in the browser.
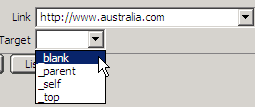
Now we will create an external link.
- In the Document window, select the graphic (aussie_xtreme.gif) at the bottom of the page.
- In the Property inspector, type http://www.australia.com in the Link text box
![]()
- Save the file and preview it in the browser.
When you link to a page, the linked page replaces the current browser page. Sometimes, however, you may want to display the browser page in a new location or window. For example, if you link to a site outside your site, you have just led your users out of your pages. If they haven’t bookmarked your URL, users may not remember how to return to your pages. If your outside links open a new browser window, your page remains in the original window.
- With the bottom graphic still selected, choose _blank, from the Property inspector’s Target pop-up menu.
- Save the file and preview it in the browser. When you click the bottom graphic, the resulting page opens in a new browser window.
You’ve experienced how easy it is to link an image to a page. The user can click anywhere on the image to go to that linked page. You can also divide an image into several links by using an image map to place individual hotspots on the image. Image maps are not limited to rectangular areas—they can also have other shapes. In the following exercises, you will add a rectangular hotspot, a circular hotspot, and a polygonal hotspot to an image.
- Create a new html page named map.
- Give the page a title "Map."
- Insert the compass_logo_gray.gif at the top of the page, making sure it is centered.
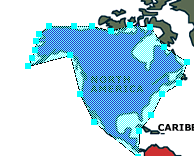
- Insert the map.jpg below the logo and center it on the page.
Rectangular Hotspot:
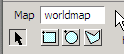
- Select the map graphic.
- In the Property inspector, type worldmap in the Map text box. Don’t use spaces or special characters in the name. You can have several image maps on a page, but each map name must be unique.
- In the Property inspector,
select the Rectangular hotspot tool
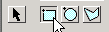 .
.
- Drag around the words
“

- Select the Pointer hotspot
tool. To resize the hotspot, drag a handle until the hotspot encompasses
the small dot representing the

- Make sure the rectangular
hotspot is selected. In the Hotspot Property inspector, type
- Click the folder icon next to the Link text box and select trips.htm that was saved in your zip folder. Trips.htm appears in the Link text box.
- Save the file and preview it in the browser.
Oval Hotspot:
- Select the large map graphic.
- In the Property inspector,
select the Oval hotspot tool
 .
.
- Drag a circle around

- Make the following changes:
- In the Alt text box, type
- In the Link text box, type http://www.australia.com. Make sure you delete the number sign (#) from this text box.
- From the Target pop-up menu, choose _blank to open a new browser window.
- Save your file and preview it in the browser.
Polygon Hotspot:
- Select the large map graphic.
- In the Property inspector,
select the Polygon hotspot tool.

- To draw a polygon, click
around the
- To edit the hotspot, select the Pointer tool and drag one of the handles to change the shape. To move the hotspot, drag within the area of the hotspot.
- Make sure the polygonal
hotspot is selected. In the Alt text box of the Hotspot Property
inspector, type
- In the Link text box, locate and select trips.htm.
- Save your file and preview it in the browser.
When a document is long or has many sections, you might want to create a
link that jumps the user to a specific
place in the document. This eliminates the tedium of scrolling through the
document. To do this, you must
create a named position—an anchor—that you can reference as the
link. This exercise illustrates the use of named anchors and the links to jump
to them. Leave the map.htm file you’ve been using open; you’ll use
that file in the next exercise.
- Open trips.htm. This file contains a large amount of text that requires scrolling to see the entire document. Insert the compass_logo_gray.gif at the top of the page and the tri_top.gif appear as bullets in front of the side headings.
- Position the insertion
point before the heading “

- Choose named anchor from the
common objects panel’s. Click Named Anchor. The Insert Named Anchor
dialog box opens. Name the anchor
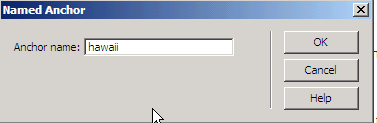
- A yellow icon appears on the page to represent the anchor. Hint: If you can’t see the icon, make sure Invisible Elements is turned on by choosing View > Visual Aids > Invisible Elements.
- Select the text “

- In the Link text box of the
Property inspector, type #
![]()
- Save the file and preview it in the browser.
The one area where HTML is case sensitive is in the naming of your anchors. If you name your anchor “top,” for example, and then type #Top in the Link text box, your link may not work consistently in all browsers. To avoid typing errors, you can use the Point to File icon located in the Property inspector.
![]()
- Add another anchor before
the Alaska Vacation heading and name the anchor
- Select the words “Alaska Vacations” at the top of the document.
- Drag the Point to File icon
and point to the
- Using the Point to File icon, insert anchors and links for the remaining headings.
- Save your file and preview it in the browser.