Hawaii
Surfer's Paradise
Before you begin to create individual Web pages, you need to create the site that contains those pages. This local site on your hard drive will mirror the actual pages on the Web server. The local site is where you do all your initial development and testing. To set up a local site, create a folder on your desktop. The name of the folder can be the name of the site or any name you choose.
After you define the main folder you will need to define your site.
Choose Site > New Site:
The Site Definition dialog box opens. At the Site name type in Hawaii Surfer's
Make sure you create a new folder for each site that you create so that your files are more manageable. To do this, when you click the folder for the local root folder, create a new folder under your student folder.

Then type a name, replacing the text New Folder. Name the folder the name of
your site, example Surfer's
Create a new HTML document in Dreamweaver.
Title the document Surfer’s
![]()
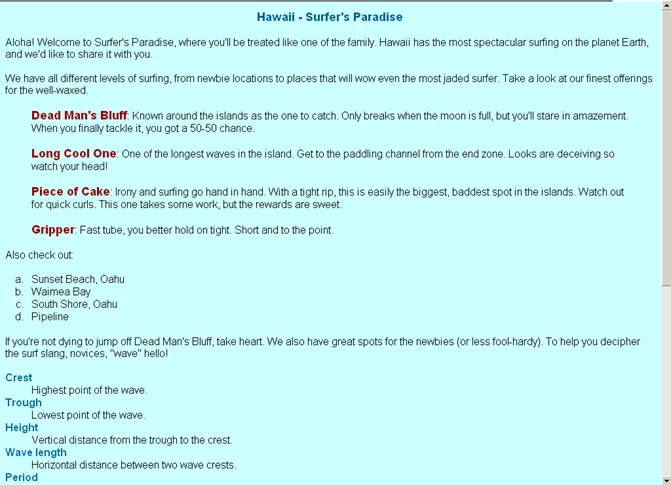
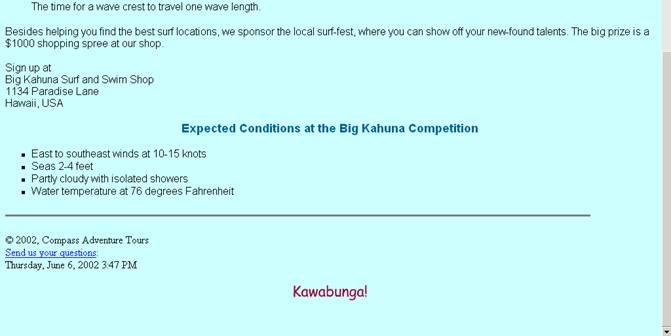
Change the background of the page to a pale blue color shown on the image below. To change the background color, click on the Page Properties button on the Properties panel to open the Page Properties dialog box.
Click on the Background color tab and select #CEFFFF for the color.
You will type the text shown below without any formatting. Once you have all the text typed in, follow the instructions below the text graphic to apply formatting to the text so it will appear like the text graphic below:
- Select
- Position the insertion point
in the heading “
 in
the Property inspector.
in
the Property inspector. - Select the four paragraphs that start with Dead Man's Bluff down to Gripper. Click the Text Indent icon in the Property Panel.

- Your text should now appear indented as shown below without the formatting to the main terms:
- Change the heading "
- Either select your color or type the number in color code box by the text color option box:
![]()
- Once you have selected a font color, you can add it to your favorites if you intent to use it in the future. You will use this font color again so we can add it to your assets panel for easy access in the future.
- Choose Window > Assets to display the Assets panel.
- Click Colors to see the asset colors.
- Choose Favorites at the top of the Assets panel.
- Click the new color button at the bottom of the Assets panel.
- With the eyedropper tool, point to the color in your title.
![]()
- Your color should now be displayed under Favorites.
- Select the text “
- Select the four lines of
text, “
- Click the list item button on the Properties panel to open the List Properties dialog box.
- Change the list type to Alphabet Small.
 \
\
- Your list should look like the one below:
- Select the text starting with “East to southeast winds” and ending with “Water temperature at 76 degrees Fahrenheit” and change the text to an unordered list. To do this click the unordered list button on the Properties panel.
- Again click the List Item icon to open the List Properties dialog box but choose square bullet list:
- Your list should look like the one below:
- Select the text starting with “Crest” and ending with “The time for a wave crest to travel one wave length.” Format this text as a definition list by choosing Text > List > Definition List.
- The terms are now at the left margin, and their indented definitions are on succeeding lines.

- Apply bold to the
definition terms (for example, “Crest” in the first
paragraph.) by clicking the bold icon
 on
the Properties panel.
on
the Properties panel.
- Apply a paragraph break between the "Besides helping" paragraph and the "Sign up at" line by Position the insertion point before the text “Sign up at” and then press Enter (Windows) or Return (Macintosh) to insert a new paragraph..
- Apply single line spacing between the next four items. Position your text after "Sign up at" and before “Big Kahuna Surf and Swim Shop.” Press Shift+Enter (Windows) to insert a single line break. The text after the insertion point moves to the next line. A new paragraph has not been created, so there is no additional spacing between the two lines.
- Repeat steps 1 and 2 to move
the text “

Cascading Style Sheets (CSS) are a collection of formatting rules that control the appearance of content in a web page. Instead of selecting text, then adding bold and a color to a collection of text throughout the document, we can create a CSS style that can be easily applied with the click of a button.
- First open the CSS Styles panel by clicking Window > CSS.
- Click the new CSS Button at the bottom of the panel to open the New CSS Rule dialog box.
- At the new CSS Rule, fill in the information as if appears below:
- Fill in the CSS format options shown below. Click OK to close the CSS Rule definition for .boldandblue.

- Select “Crest,” the first term in the definition list. Click the Style drop down list by the CSS button on the Properties panel and select boldandblue.
- Your text should now appear turquoise and bold. Apply the same css style to the remaining definition terms on this page. Now we will create a new css style for the indented main terms.
- Create a new css style with a different color font and make the words bold. Apply this new style to the text Dead Man's Bluff, Long Cool One, Piece of Cake, Gripper.
You will now place the horizontal rule under the water temperature bulleted list shown below.

Horizontal rules (lines) are useful for organizing information. On a page, you can visually separate text and objects with one or more rules. To create a horizontal rule:
- In the Document window, place the insertion point where you want to insert a horizontal rule, under the bulleted list shown above. Do one of the following: Select Insert > HTML > Horizontal Rule.
To modify a horizontal rule:
- In the Document window, select the horizontal rule. In the Property inspector, type 90 in the W (width) text box. Select % from the pop-up menu to the right of the text you just typed.
- Deselect Shading to display a solid bar. Type 3 in the H (height) text box.
- From the Align pop-up menu, select Left.

When working in Dreamweaver, you are generally typing at the keyboard. Sometimes you need characters and other information that is not directly accessible from the keyboard. With Dreamweaver, you can easily insert special characters, e-mail links, and dates.
- In the Document window, place the insertion point where you want to insert a special character, before the year (2000).
- Select the name of the character from the Insert > HTML > Special Characters submenu.
Linking to an e-mail address makes it easy for your visitors to contact you from a Web page. You should always include some method to allow visitors to correspond or interact with someone in your organization.
- Place the insertion point on the line following the copyright you created earlier.
- Click Insert > E-Mail Link. The Insert Email Link dialog box opens. Type in the information shown below.
Sometimes you will need to keep track of the date when you last modified a page in your site. Dreamweaver lets you place the date and time on your pages to track this information. The date and time can be updated automatically so you don’t have to do it.
- Place the insertion point on the line following the e-mail link.
- Click Insert then select Date. Select the date format you want, then click OK to place the date on your page.

Check the update automatically on save to update the date on your page each time you save your document.
When you add a heading to your page, your options are to use text and format it as a heading tag or to create a graphic and insert it on your page. Text formatted as a heading loads quickly because it is text, but your font and size choices are limited. Graphics as headings solve the font choice problem, but you may not have access to a graphics program, or you may not have enough time to create the graphic you need.
Flash text provides the best of both these options. You can use any font you choose and create the text within Dreamweaver. The text you create is a small Flash file (a SWF file). Because it is Flash and not normal body text or a bitmap graphic, you can resize Flash text directly in the Document window.
- Select the text Kawabunga. Cut it so that you have it on your clipboard. You are going to replace the text with flash text.
- On the Common Objects panel,
click Media:Plugin
 to
drop down you options.
to
drop down you options. - Select Flash Text.
- From the Font pop-up menu, choose Comic Sans. (Choose another font if this is not available on your machine.)
- In the Size text box, type 22.
- From the Color pop-up menu, choose a maroon color.
- From the Rollover pop-up menu, choose a blue color.
- In the Text text box, type Kawabunga! (or paste from the clipboard)
- For Bg Color, type CCFFFF or use the eyedropper and click the background in the Document window.
- In the Save As text box, type kawa_text.swf and then click OK.
- In the Property inspector, click Play to start the Flash animation.
- In the Document window, place your pointer over the Flash text. The text changes to the rollover color you chose.
- In the Property inspector, click Stop.