Web Design & Development I
Student Version
Student Version
The marquee tool is the basic tool that allows you to select all or part of objects. The marquee tool will generally have the option to select either an oval or a square shape as the selection tool, but some programs offer more choices.
To select an area, simply click and drag the marquee around the area you want to select. Most graphics programs allow you to draw a perfect circle or perfect square by holding the shift key when you drag. Another common keyboard shortcut is to hold down the space bar while you drag to reposition the location of the marquee.
The selected area will be identified by the “marching ants” surrounding it (moving dashed lines). After your selection has been made, the marquee allows you to manipulate the selection in a number of ways. Among these are:
The lasso tool is another selection tool that allows more fine control over the selection area than the basic oval and square marquee shapes. By clicking down and dragging, the lasso tool allows you by freehand to draw the selection line.
Many programs offer different types of lasso tools that can be used to make selections. The polygon lasso tool allows you to create a selection by clicking on individual points that connect to create a selection line.
The magic wand tool is used to select pixels that are the same color or similar color in an adjacent area. You can adjust the tolerance level of the magic wand tool to determine how similar the colors have to be. A low tolerance means the pixels have to be nearly the same color, while a higher tolerance allows for more variation. The magic wand tool is good for selecting objects from against a solid color background.
To fine tune your selections, there are some keyboard shortcuts that are fairly standard amongst graphics programs. Holding down the shift key while using one of the selection tools will add to an existing selection. Holding down the alt key while using one of the selection tools will subtract from the selection. Try using a combination of different selection tools along with the shift and alt keys in order to fine tune your selection further. After some practice, you will develop some techniques that work best for you.
You can feather a selection to soften the edges of a selected object. Often, when using the selection tools to create a cutout of an object, the edges will be slightly rough and jagged. This causes the cutout to appear unnatural and not blend in well with other elements in the graphic. Feathering can be used to help smooth the edges of a cutout object, giving the edges a softer look.
Another use for feathering is to create a vignette effect. A vignette effect is where the border of an image is feathered so that the edges of the images seem to fade into the background.
When feathering a selection, there are usually two options in most graphics program. The first option is to set the feathering property for the selection tool itself before you make the selection. The second option is to adjust feathering for a selection that has already been made by using the feather option, usually found under the selection menu.
The inverse selection tool lets you flip a selection so that the object you selected is no longer selected, but everything else on the page now is. This is especially helpful for use with the magic wand tool. The magic wand tool is useful for selecting objects against a solid background. Instead of selecting the object itself, though, it is easier to select the background. Then you can use the inverse selection function to select the object.
Inverse selection is usually found under the selection menu of the graphics program.
Despite your most diligent efforts to make a perfect selection, it is inevitable that you will run into situations where the cutout still has artifacts from the background you were trying to remove. The eraser tool is helpful to help remove these small pieces. A good trick is to zoom way in on the area you are erasing so that you can see the individual pixels. Some graphic programs allow you to set a feathered edge to the eraser tool. This is useful to help touch up and soften the edges of a cutout.
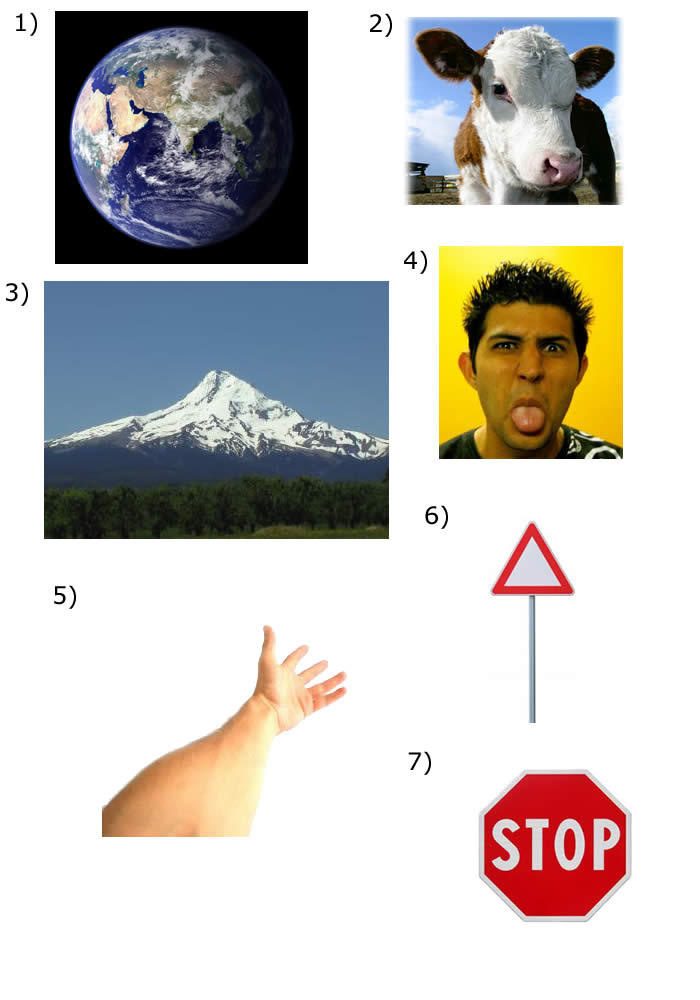
Open up the file selection_practice.jpg in your graphics software. You will then use the various selection tools to extract each of the images from their backgrounds. Once you have made your selection, copy and paste the image onto its own separate layer. Experiment with using feathering and the eraser tool to help smooth the edges of your selections.
Copyright © 2005-2008 by University of Washington. Permission is granted to use these materials in whole or in part for educational, noncommercial purposes provided the source is acknowledged. This product was created with support from the National Institute on Disability and Rehabilitation Research of the U.S. Department of Education (grant #H133D010306), and is maintained with support from the National Science Foundation (grant #CNS-054061S). The contents do not necessarily represent the policies of the U.S. federal government, and you should not assume their endorsement.